 ultimate-guide
How to Make Custom Burritos at Home
Table of Contents
- What You'll Need: Essential Ingredients and Equipment
- Best Burrito Fillings and Ingredient Prep
- Step-by-Step Assembly Instructions
- How to Fold a Burrito Without Breaking It
- How to Plan a Taco Bar for Parties
- Freezer-Friendly Storage and Reheating
- Common Mistakes to Avoid
- Frequently Asked Questions
Last Updated: September 1, 2026
What You'll Need: Essential Ingredients and Equipment
Making custom burritos at home starts with gathering the right components. You'll need a flour tortilla as your base. Beyond the tortilla, the foundation of any great burrito comes down to quality ingredients prepared ahead of time.
For proteins, ground beef is the classic choice. You'll want to brown it properly with taco seasoning, draining the excess grease afterward so your burrito doesn't become soggy. If you're planning to make multiple burritos or meal prep for the week, cooking a larger batch of seasoned ground beef upfront saves significant time.
Your filling station should include refried beans, black beans, or a mix of both. Rice, preferably cilantro lime rice for flavor, rounds out the base. From there, the customizable toppings expand your options: diced onions, fresh cilantro, salsa, cheese, sour cream, guacamole, or lettuce. The key is having everything prepped and organized before you start assembling.
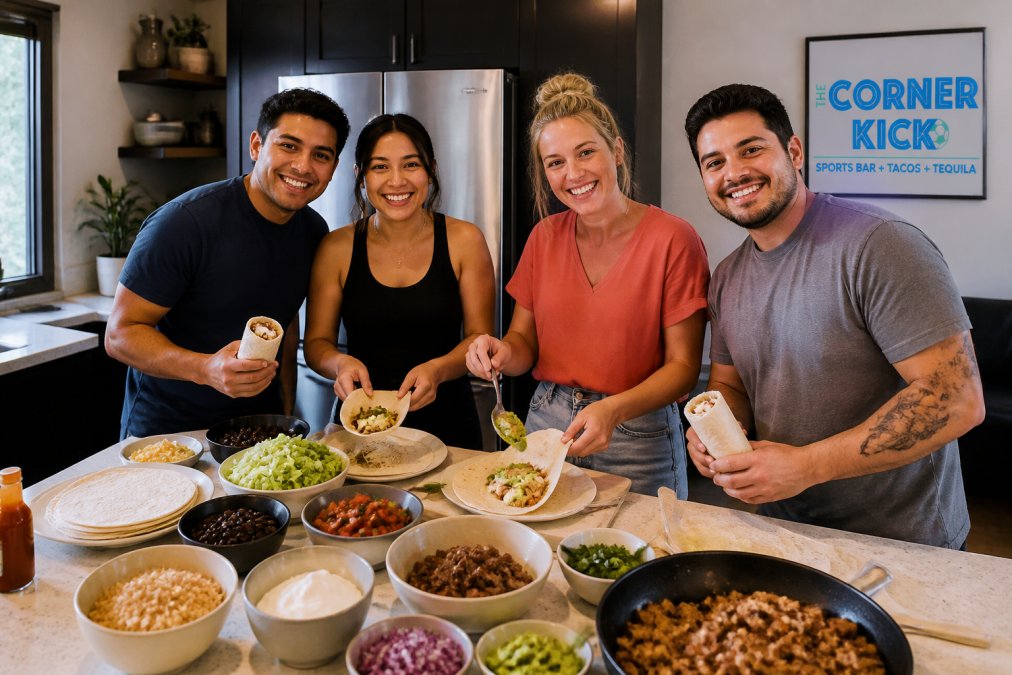
Equipment-wise, keep it simple. A cutting board provides your assembly surface. Small bowls for each ingredient make the process smoother. Foil wrappers help with storage and reheating. A skillet handles your ground beef cooking. If you're planning a taco bar for parties, having everything laid out in separate containers lets guests build their own custom burritos at home style.
Best Burrito Fillings and Ingredient Prep
The difference between a burrito that falls apart and one with structural integrity comes down to how you prepare and layer your fillings. Think about moisture content first. Wet ingredients (salsa, sour cream, guacamole) should go in the middle of your burrito, surrounded by drier components that act as a moisture barrier.
Cooking Your Ground Beef
Brown your ground beef in a skillet over medium-high heat, breaking it apart as it cooks. This typically takes 8-10 minutes (usda.gov). Once the meat is fully browned, drain the grease, this step is critical. Excess fat makes your burrito soggy and heavy. After draining, add taco seasoning according to package directions and simmer for another 2-3 minutes. Let the seasoned meat cool slightly before assembling; hot meat can make your tortilla steam and become fragile.
The amount of ground beef per burrito matters too. A standard burrito uses about 3-4 ounces of cooked meat (the FDA). Overstuffing is the most common mistake people make when learning how to make custom burritos at home.
Building Your Flavor Profile
Your flavor profile starts with the base proteins and beans, then builds outward. Cilantro lime rice brings brightness and prevents the burrito from feeling one-dimensional. If you're using salsa, choose one that complements your other ingredients. A mild salsa pairs well with bold spices in the meat; a spicier salsa works better with simpler, cleaner flavors.
Diced onions add crunch and sharpness. Fresh cilantro brings herbal notes. Cheese (typically cheddar or a Mexican blend) adds richness and helps bind ingredients together. Sour cream and guacamole provide creaminess but should be used sparingly, they're heavy ingredients that quickly make a burrito difficult to eat.
The order of layering affects how flavors come through. Place your beans first, then rice, then meat, then lighter toppings. This creates a balanced bite where every element comes through rather than one ingredient dominating.
Step-by-Step Assembly Instructions
Assembling a burrito is straightforward once you understand the technique. Start with your flour tortilla laid flat on a clean surface. If your tortilla is cold from the refrigerator, warm it slightly, a 10-second microwave blast or 5 seconds in a dry skillet makes it more pliable and less likely to crack.
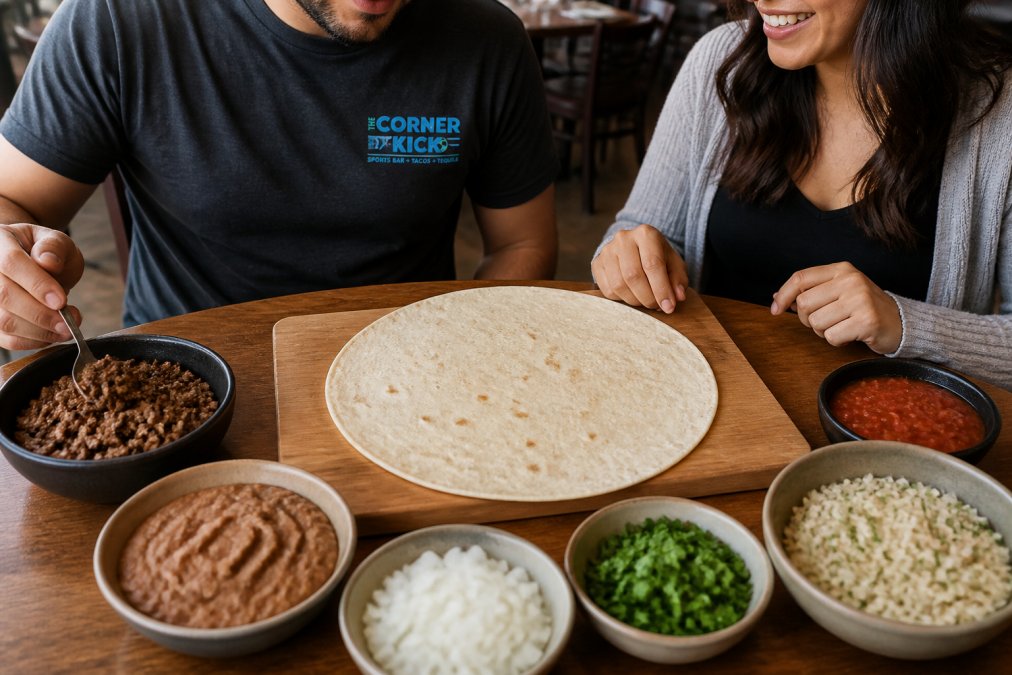
Place your ingredients in a horizontal line about one-third of the way up from the bottom edge of the tortilla. Start with refried beans (2 tablespoons), then add cilantro lime rice (2-3 tablespoons), followed by your seasoned ground beef (3-4 ounces). Top with diced onions, fresh cilantro, and a small amount of salsa. Skip the sour cream and guacamole for now, they go better after the burrito is fully wrapped.
The amount of filling is crucial. A common mistake is overstuffing. You want enough to create a flavorful bite, but not so much that the tortilla can't fold around it.
Leave about 2 inches of tortilla on all sides, especially the top and bottom. This space is what allows you to fold properly without the filling spilling out. Once your filling is in place, fold the bottom edge of the tortilla up and over the filling, tucking it tightly underneath. This creates the seal that holds everything together.
How to Fold a Burrito Without Breaking It
The folding technique separates a burrito that stays intact from one that falls apart on the first bite. After you've tucked the bottom edge underneath, fold in the left and right sides of the tortilla, creating triangular flaps. Fold them tightly toward the center, overlapping slightly. This is where many people rush, take your time and ensure each fold is snug.
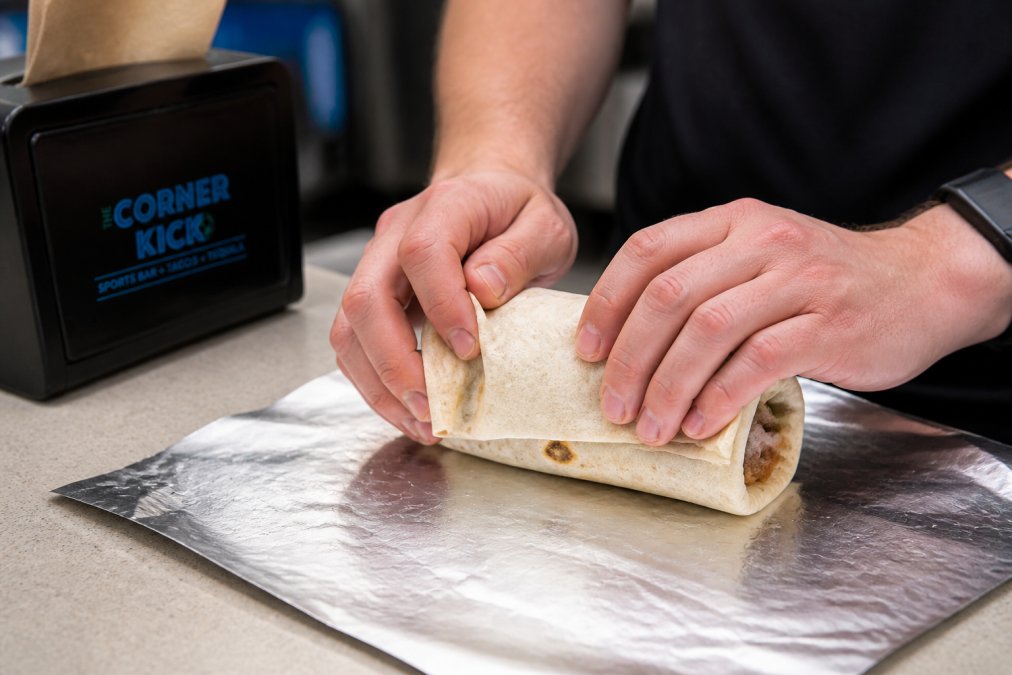
Once the sides are folded, roll the burrito away from you, keeping tension on the tortilla as you go. The goal is a tight roll with no loose edges. If you feel resistance as you roll, stop and adjust, don't force it. A tortilla that's been torn during rolling will unravel.
Achieving Structural Integrity
Structural integrity depends on three factors: tortilla quality, filling moisture balance, and folding technique. If your tortilla is too thin or has been sitting in a warm environment, it becomes fragile.
Moisture balance prevents the tortilla from becoming soggy and weak. If salsa or sour cream is touching the tortilla directly, it begins to soften immediately. This is why layering matters, place wet ingredients in the center, surrounded by rice and beans that absorb excess moisture without transferring it to the tortilla. versatile seasoning blends.
The folding technique itself creates structural integrity. A tight roll compresses the ingredients, creating pressure that holds everything in place. A loose roll leaves gaps where ingredients can shift and separate, eventually causing the burrito to burst. When you roll, pull the tortilla toward you with consistent pressure. The burrito should feel firm and compact when you finish.
How to Plan a Taco Bar for Parties
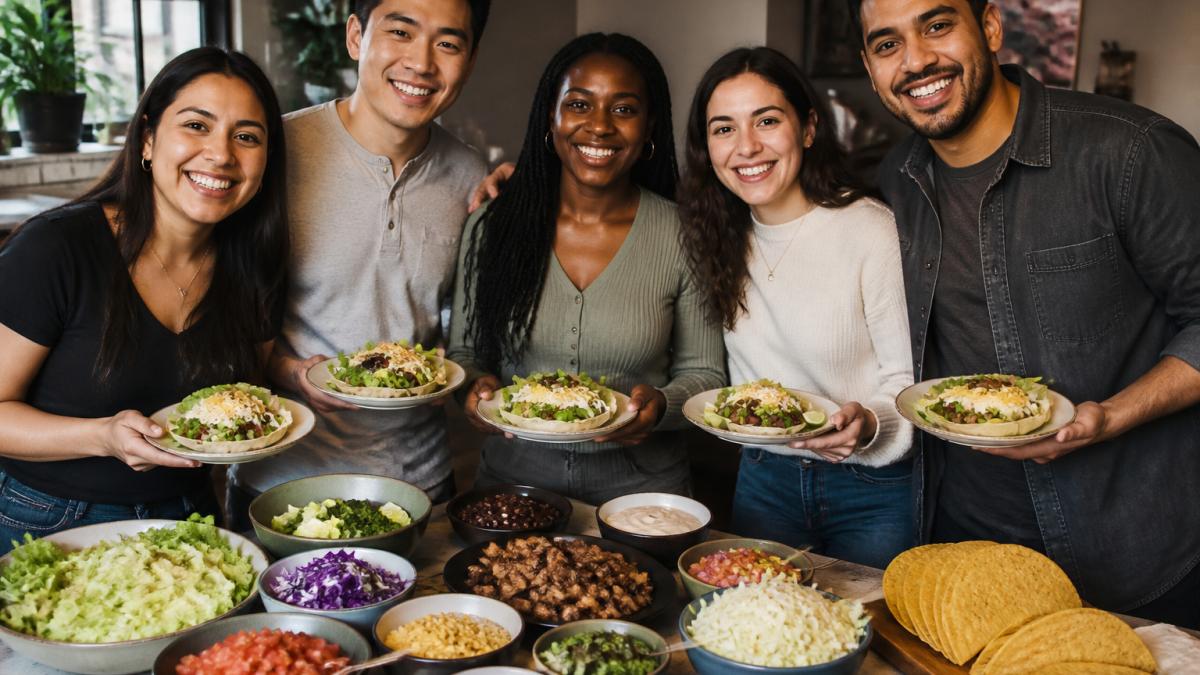
A taco bar setup works perfectly for custom burritos at home when you're hosting a group. The beauty of this approach is that guests build their own, which means everyone gets exactly what they want while you minimize prep work during the event.
Organize your taco bar in order of assembly: proteins first, then bases (rice and beans), then toppings, then finishing ingredients. Set out the browned ground beef in a warming container or small slow cooker to keep it hot. Place refried beans and black beans in separate bowls nearby. Have cilantro lime rice in its own container.
Toppings should be arranged in small bowls: diced onions, fresh cilantro, salsa (offer 2-3 varieties), shredded cheese, sour cream, guacamole, and lettuce. Include small serving spoons in each bowl so guests don't mix utensils and flavors.
Provide a stack of flour tortillas (warm them in a kitchen towel to keep them pliable), and have foil wrappers available for anyone who wants to wrap their burrito immediately. Set out small plates so guests can assemble their burrito and eat comfortably.
For a group of 10-15 people, prepare about 2 pounds of ground beef, 3-4 cups of cooked rice, and 2-3 cups of beans combined. You'll go through more than you expect, and running out of a key ingredient mid-party creates bottlenecks.
Freezer-Friendly Storage and Reheating
Making custom burritos at home becomes a meal-prep powerhouse when you understand how to freeze and reheat them properly. Assemble your burritos without sour cream, guacamole, or fresh lettuce, these don't freeze well. Stick with ground beef, beans, rice, onions, cilantro, and salsa.
Wrap each burrito tightly in foil-wrapped style, then place them in a freezer bag with the air removed. They'll keep for up to 3 months (usda.gov). Label the bag with the date and contents so you know what you're grabbing weeks later.
To reheat, unwrap the foil and wrap the burrito in a damp paper towel. Microwave for 2-3 minutes until heated through. Alternatively, place the foil-wrapped burrito in a 350-degree oven for 15-20 minutes. The oven method produces a slightly better texture because it warms more evenly without creating steam pockets.
After reheating, add fresh toppings: sour cream, guacamole, fresh lettuce, or additional salsa. This approach gives you the convenience of freezer-friendly storage without sacrificing the fresh, quality taste of custom burritos at home.
Thaw burritos overnight in the refrigerator if you're planning ahead, or reheat them directly from frozen, it just takes an extra minute or two. The key is keeping the foil wrapper on during reheating to prevent the tortilla from drying out.
Common Mistakes to Avoid
The most frequent error when making custom burritos at home is overstuffing. A burrito that's packed too tightly with filling will burst during folding or tear when you bite into it. Aim for a burrito that's full but still has structural integrity, you should be able to hold it without pieces falling out.
Another common mistake is using cold ingredients. Cold ground beef, cold rice, and cold beans are harder to work with and create a less cohesive final product. Warm your ingredients slightly before assembling, but not so hot that they make the tortilla steam and become fragile.
Skipping the moisture barrier is a setup for a soggy burrito. If salsa and sour cream touch the tortilla directly, they'll soften it within minutes. Always layer your wet ingredients in the middle, surrounded by rice, beans, or meat that acts as insulation.
Many people also underestimate the importance of a tight roll. A loose burrito feels sloppy and falls apart. Take your time with the folding step, and apply consistent pressure as you roll. It should feel compact and firm when you finish.
Finally, don't skip draining the grease from your ground beef. Excess fat makes the burrito heavy, greasy, and prone to sogginess. Proper draining is a quick step that dramatically improves the final product.
Making custom burritos at home doesn't require special skills or expensive equipment, just organization and technique. At The Corner Kick Cantina, we've perfected the balance of fresh ingredients, proper preparation, and structural integrity that transforms a simple burrito into something memorable. Whether you're meal prepping for the week or hosting a taco bar for friends, the principles remain the same: quality flour tortillas, well-seasoned ground beef, a moisture barrier of rice and beans, and a tight fold that holds everything together. Start with these fundamentals, and you'll create burritos that stay intact from first bite to last. Ready to master the art of custom burritos at home? Visit The Corner Kick Cantina to experience how scratch-made ingredients and expert technique come together, or book a private event where we can help you host your own taco bar celebration.
Frequently Asked Questions
How do you properly fold a burrito so it doesn't fall apart?
Start by placing your filling in the center of a warm flour tortilla, leaving a 2-inch border. Fold the sides inward first, then roll tightly from the bottom up, tucking as you go. The key is maintaining even pressure throughout the wrap to create structural integrity. A tight roll prevents the filling from shifting and the tortilla from tearing. For extra security, wrap it in foil immediately after folding while the tortilla is still warm.
What are the best ingredients for a custom burrito?
Start with a quality flour tortilla as your base. For protein, seasoned ground beef, black beans, or refried beans work well. Add cilantro lime rice for texture and flavor. Include diced onions, salsa, and fresh cilantro for brightness. Balance is essential, too much filling makes folding impossible.
How can I keep homemade burritos from getting soggy?
Drain excess grease from your browned meat and simmer beans until they're thick, not watery. Keep wet ingredients like salsa to a minimum or serve on the side. Store burritos in foil-wrapped portions in the freezer rather than the refrigerator, this prevents condensation. When reheating, use a microwave-safe method rather than steaming.
Can I make burritos ahead of time for meal prep?
Yes, burritos are excellent for meal prep. Assemble them, wrap each one tightly in foil, and freeze for up to 3 months. Freezer-friendly burritos should be fully cooled before wrapping to prevent condensation. When ready to eat, thaw overnight in the refrigerator or reheat directly from frozen using a microwave or skillet. Foil-wrapped burritos reheat evenly and maintain their texture better than unwrapped versions. This approach makes weekday meals fast and convenient.